How to Choose the Right Graphite Wear Plate Size
I’ve been in the wear plate business for over a decade, and if there’s one question I hear more than any other, it’s this: “What size do I need?”
It sounds simple. But I’ve seen engineers order plates that are too thin and watch them crack within weeks. I’ve seen buyers overspend on massive plates when a smaller configuration would have worked better. And I’ve lost count of the times someone forgot to account for heat expansion and ended up with a buckled plate that had to be scrapped.
Getting the size right isn’t rocket science. But it does require a systematic approach. Here’s exactly how I walk customers through it.
The right graphite wear plate size depends on your load requirements, the surface area of the mating part, your operating temperature, and how you plan to mount it. Start by measuring the length and width of the contact area, then pick a thickness based on the PSI the plate needs to handle. Always leave room for thermal expansion — graphite can expand 2% or more at 500°C — and verify your bolt pattern before ordering.
In this guide, I’ll walk you through eight sizing decisions that every buyer needs to make. I’ve ordered them in the sequence I use with my own customers. Follow them in order, and you won’t miss anything.
Determine Your Load Capacity and Operating Temperature Before Measuring
Before you grab a ruler, understand what the plate is up against.
Start with the load. How much weight or force will the plate carry? Is it constant pressure or intermittent impact? Graphite-plugged bronze wear plates handle static loads up to 3,000 PSI and dynamic loads around 1,500 PSI, according to SelfLube and Viiplus — two of the largest wear plate manufacturers in North America. If your application exceeds those numbers, you’ll need a thicker plate or a steel-backed grade.
Next, consider the environment. High heat? Graphite wear plates maintain lubricity up to 500°C, which makes them ideal for heat treating furnaces and kilns. Moisture or chemicals? The bronze backing resists corrosion well, but the specific alloy matters — aluminum bronze handles marine environments better than standard leaded bronze. The Gamp Industries material selection guide confirms that operating environment is the first factor to check, ahead of dimensions.
Also check which industry standards apply to your equipment. Common ones include VDI (German engineering standard), JIS (Japanese industrial standard), NAAMS (North American standard for automotive tooling), and SMC (standard for pneumatic components). Your wear plate should conform to whichever standard your machinery follows. Most reputable manufacturers list which standards their plates comply with.
I learned this the hard way early in my career. A customer ordered plates for a furnace door application without telling me the operating temperature. We shipped standard-grade plates. Within a month, the graphite plugs had oxidized and fallen out. The replacement order with high-temperature grade cost double and took three extra weeks. A five-minute conversation upfront would have solved it.
Here’s what I do now: I keep a checklist that I ask every customer to fill out before we talk sizes. It covers load (static and dynamic), temperature range, environment (dust, moisture, chemicals), industry standard, and motion type (linear sliding, rotational, or static). If you fill that out first, you eliminate 80% of sizing mistakes before they happen.
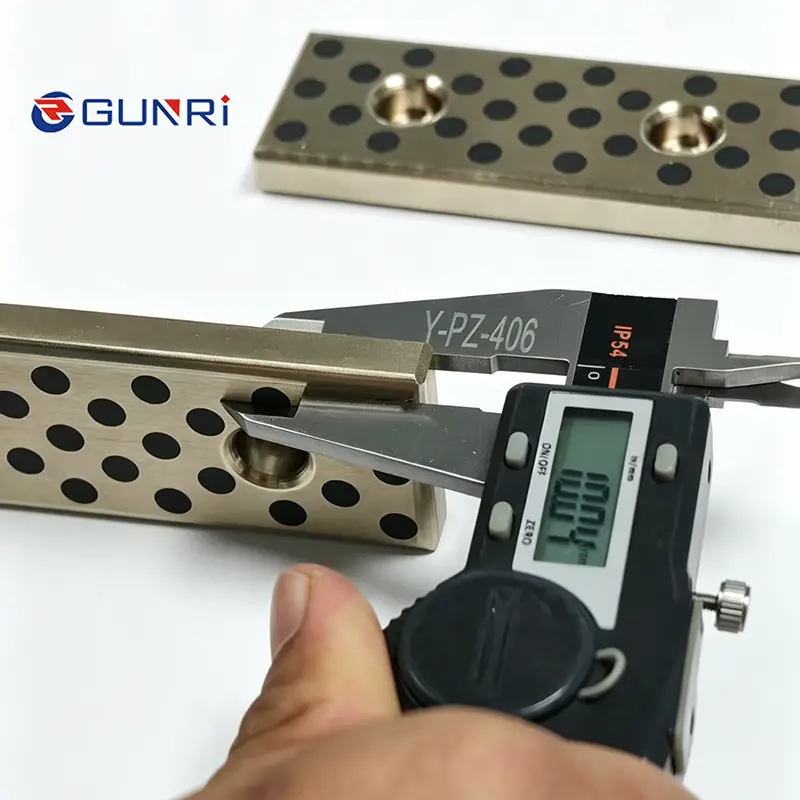
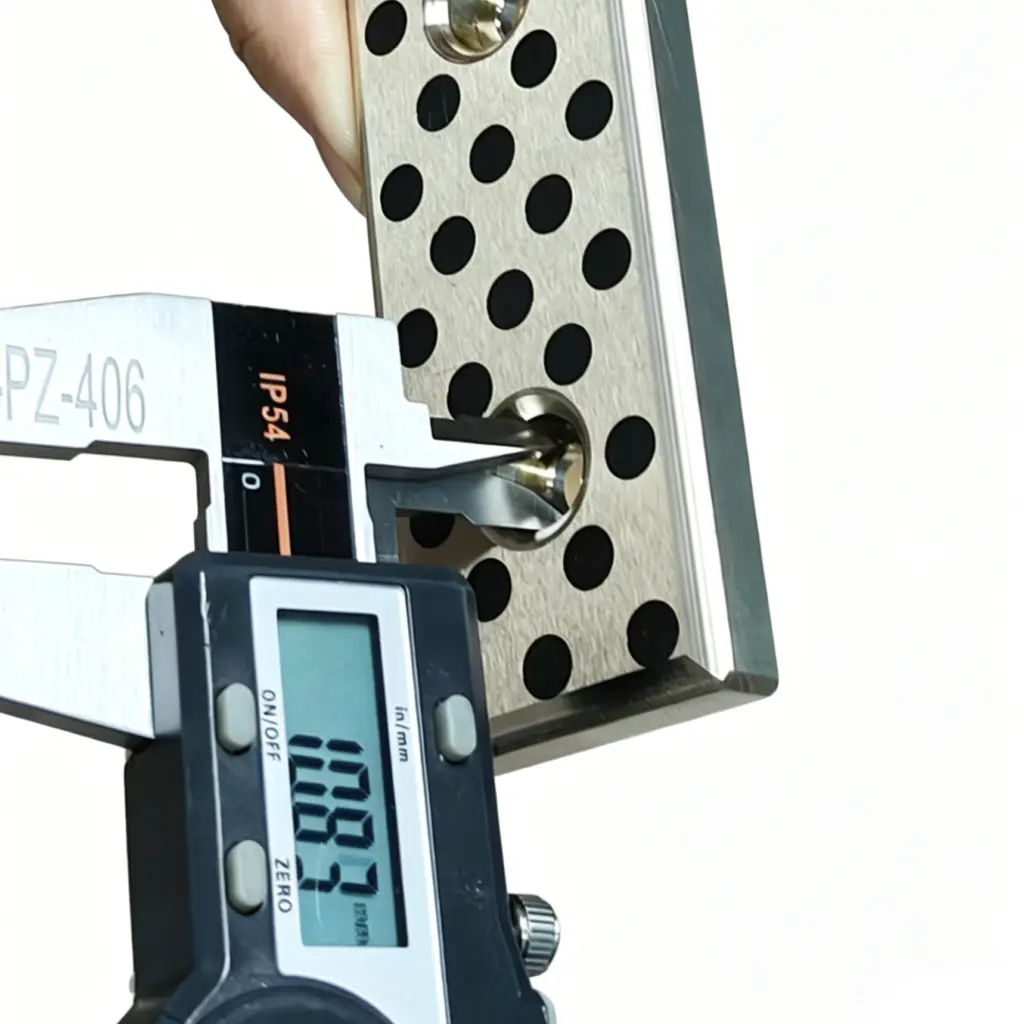
Measure Length and Width with a Caliper, Not a Tape Measure
This sounds too basic to need explaining. But you’d be surprised how many people get it wrong.
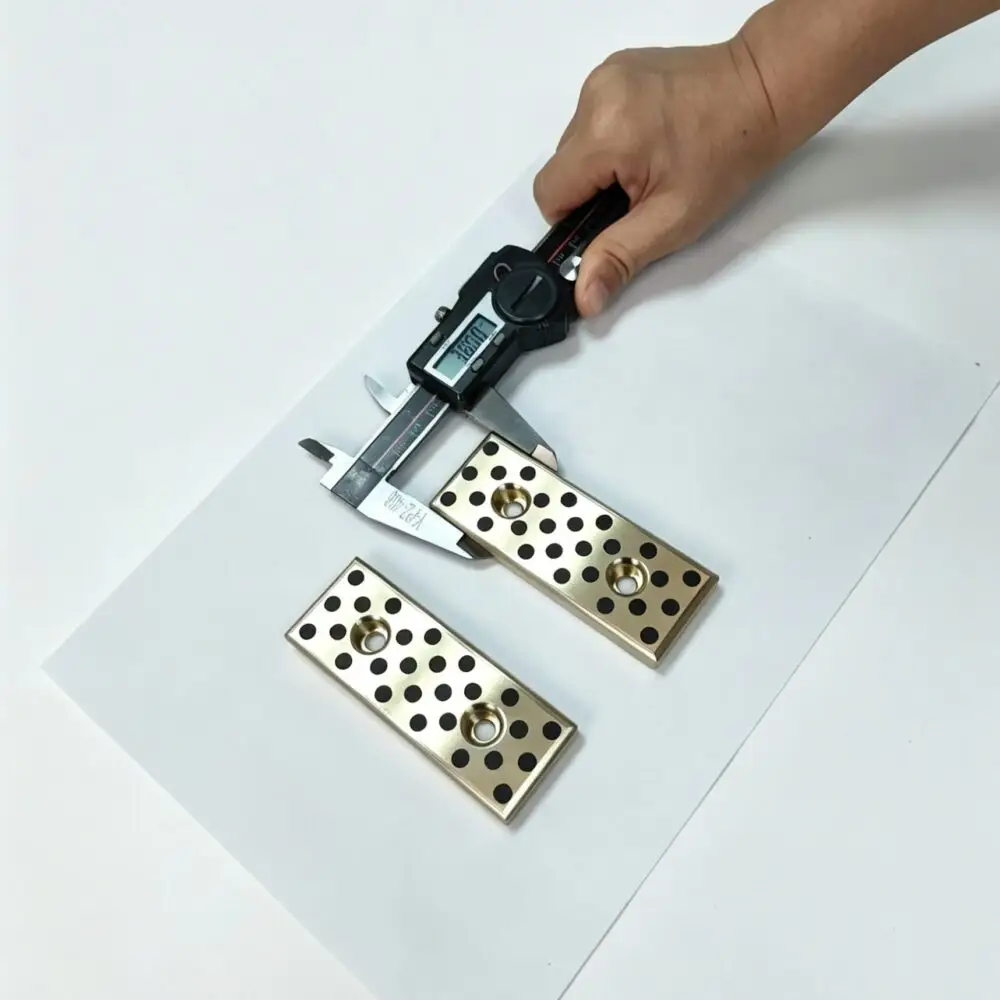
Use a caliper, not a tape measure. Wear plates are precision components, and a 1 mm error at the measuring stage becomes a 1 mm gap or interference at installation. Take measurements at three different points along each dimension — surfaces are never perfectly flat — and record the average.
Always measure both in millimeters and inches. Some manufacturers work in metric, others in imperial. If you only provide one, you risk a conversion error. I’ve seen a 6″ plate ordered as 6 mm, and a 200 mm plate ordered as 200″. Both were expensive mistakes for the buyer.
Standard graphite wear plate sizes typically follow these increments:
Metric standard sizes:
100 x 100 mm, 100 x 150 mm, 150 x 200 mm, 200 x 200 mm, 200 x 300 mm, 300 x 300 mm, 300 x 400 mm, 400 x 400 mm
Imperial standard sizes:
2″ x 2″, 2″ x 4″, 4″ x 4″, 4″ x 6″, 6″ x 6″, 6″ x 8″, 8″ x 8″, 8″ x 12″, 12″ x 12″
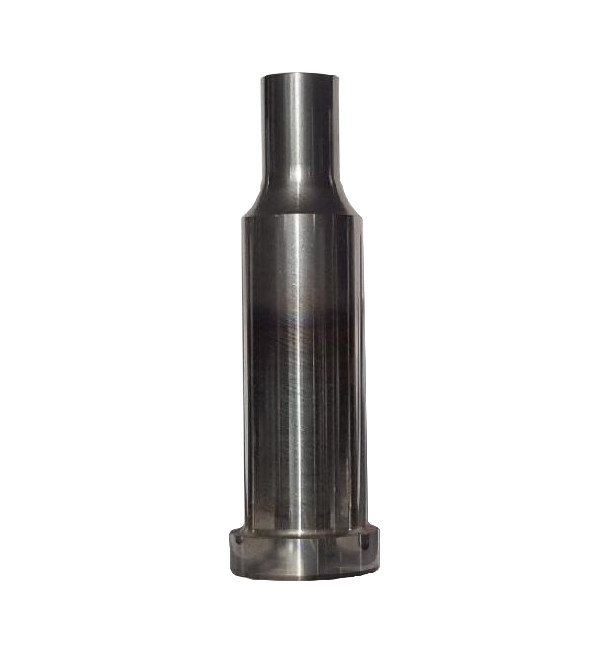
All these standard sizes are ready to ship in our oilless wear plate with graphite range.
If your measured surface falls between standard sizes, go up to the next size rather than down. A slightly oversized plate can be machined down if needed. An undersized plate leaves your equipment unprotected.
One trick I use: if your mating surface is 185 mm wide, order a 200 mm plate. You can machine off the excess 15 mm and still have a clean edge. If you’d ordered a 150 mm plate, you’d be 35 mm short — and that gap will become a wear point.
Pick a Thickness One Grade Above Your Minimum Requirement
Thickness is where most sizing mistakes happen. Too thin, and the plate fails under load. Too thick, and you’re wasting money and adding unnecessary weight.
Here’s the thickness guide I use with customers:
| Application Type | Recommended Thickness | Max Static Load | Typical Industries |
|---|---|---|---|
| Light-duty positioning guides | 3 mm – 6 mm (1/8″ – 1/4″) | Up to 500 PSI | Packaging, material handling |
| Medium-duty mold slides | 8 mm – 12 mm (5/16″ – 1/2″) | 500 – 1,500 PSI | Injection molding, die casting |
| Heavy-duty stamping dies | 15 mm – 20 mm (5/8″ – 3/4″) | 1,500 – 3,000 PSI | Automotive stamping, metal forming |
| Extreme / mining & heavy equipment | 20 mm – 25 mm (3/4″ – 1″) | 3,000+ PSI | Mining, quarry, construction |
These numbers assume standard graphite-plugged aluminum bronze — the most common grade for industrial wear plates. If you’re using steel-backed plates, expect roughly 30% higher load capacity. If you’re using a leaded bronze alloy, capacity drops by about 15%. The bronze alloy grade (G-CuAl10Ni vs. RG10 vs. RG5) changes the load rating significantly, so confirm your material grade with the manufacturer before finalizing thickness.
Here’s a practical tip: go one thickness grade above what you think you need. The cost difference between a 10 mm and a 15 mm plate is usually 20–30% more. But the service life difference can be 200% or more. Thicker plates can also be re-surfaced and re-used, while thin plates are throw-away once they wear past tolerance.
I had a customer once who insisted on 8 mm plates for a die set application I’d normally spec at 12 mm. He wanted to save $18 per plate. Six months later, nine out of twelve plates had worn below minimum thickness and needed replacement. The “savings” cost him four times as much in replacement labor and downtime.
Leave Expansion Gaps for Any Application Above Room Temperature
This is the step almost everyone forgets — and the one that causes the most dramatic failures.
Graphite expands when heated. At 500°C, a 300 mm graphite wear plate will expand by about 6 mm. If you don’t leave room for that expansion, the plate will buckle, crack, or push against adjacent components. I’ve seen a row of wear plates turn into a wave because the installer didn’t leave expansion gaps.
The thermal expansion coefficient for graphite-plugged bronze wear plates is roughly 16–18 x 10⁻⁶ /°C for the bronze backing and 4–8 x 10⁻⁶ /°C for the graphite plugs. The overall expansion of the composite depends on the plug density and bronze grade. Every manufacturer publishes thermal data for their specific grade — ask for it.
Here’s my rule of thumb for clearance:
| Operating Temperature | Clearance Per 100 mm of Plate Length |
|---|---|
| Room temperature (20°C) | 0.3 – 0.5 mm |
| Moderate heat (200°C) | 0.5 – 1.0 mm |
| High heat (500°C) | 1.0 – 1.5 mm |
| Extreme heat (800°C+, special grades) | 2.0 – 3.0 mm |
One nuance that most guides don’t cover: graphite expansion is not uniform in all directions. The material expands differently along its length versus its thickness — this is called anisotropic expansion. If your plate is 300 mm long and 12 mm thick, the length expansion will be different from the thickness expansion. Factor both into your clearance calculation.
If your application cycles between room temperature and operating temperature repeatedly (like a furnace door that opens and closes), the expansion and contraction cycle puts mechanical stress on the plate. In these cases, I recommend using Belleville washers or spring-loaded mounting hardware to allow the plate to expand and contract without binding.
Choose Standard Sizes First, Custom Only When Necessary
Standard sizes are faster and cheaper. Custom sizes cost more but fit perfectly. Here’s how I help customers decide.
Go with standard sizes if:
- Your measured surface is within 10% of a standard size
- You have a simple rectangular shape
- You don’t need special hole patterns or edge details
- You need the plates in under two weeks
Go custom if:
- Your surface is L-shaped, tapered, or irregular
- You need bolt holes in non-standard locations
- Your tolerance requirement is tighter than ±0.13 mm
- You need a non-standard thickness (e.g., 14 mm when standard is 12 mm or 15 mm)
There’s also a middle ground that many buyers don’t consider: order a standard size and machine it down. If you have in-house machining capability, you can buy a 200 x 200 x 15 mm standard plate and mill it to 185 x 192 x 13 mm in-house. This usually costs less than a full custom order and ships faster.
Standard plates are typically 30–50% cheaper than custom on a per-unit basis. Browse our standard oilless wear plates to see available sizes. If your quantities are under 50 pieces and your dimensions are non-standard, custom may be the better choice. Above 50 pieces, the setup cost for custom tooling gets amortized and the price gap narrows significantly.
Specify Your Tolerance in the RFQ, Not After Delivery
Tolerance matters more than most buyers realize.
Standard graphite wear plates are manufactured to ±0.13 mm (0.005″) for length and width, and ±0.05 mm (0.002″) for thickness. If you’re working with precision mold sets or die components, you might need ±0.025 mm (0.001″).
Moving from standard ±0.13 mm to precision ±0.025 mm typically adds 10–15% to the unit price. The real cost isn’t the price premium — it’s the fit failure. A plate that’s 0.1 mm too thick might not fit into its pocket at all, requiring additional machining that costs far more than the tolerance upgrade would have.
I always tell customers to specify their tolerance requirements in the initial RFQ. If you don’t, manufacturers will default to standard tolerance, and you might get plates that don’t fit. I’ve processed too many rush re-orders because someone assumed “standard tolerance” would be tight enough for their precision die set.
If you’re replacing an existing wear plate, measure the pocket or recess depth — not just the old plate thickness. Over time, wear plates compress and deform slightly, so the old plate’s thickness won’t tell you the actual available space.
Match Your Mounting Method to the Plate Thickness
The best-sized plate is useless if you can’t mount it securely.
Graphite wear plates are typically mounted using counterbored bolt holes, edge slots, adhesive bonding, or welded studs. Each method affects your sizing differently.
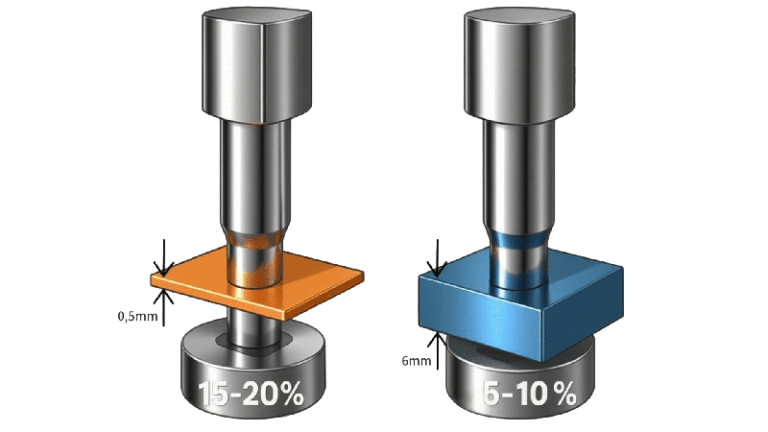
Counterbored holes — The most common method. The counterbore reduces effective plate thickness at the hole location. If your plate is 12 mm thick and you drill a 5 mm deep counterbore for a socket head cap screw, the remaining thickness under the screw head is only 7 mm. Confirm this reduced thickness can still handle your load.
Edge slots — These preserve full plate thickness because they’re cut into the sides rather than the contact surface. They’re ideal for thin plates or high-load applications where every millimeter of thickness matters.
Adhesive bonding — Becoming more common with modern high-strength epoxies. It eliminates bolt holes entirely, so you can use thinner plates without worrying about counterbore depth. The trade-off is that removal requires heat or mechanical force.
Welded studs — Common in heavy equipment and mining applications. The studs are welded to the mounting surface, and the plate slides over them. This method doesn’t reduce plate thickness but requires precise stud placement during installation.
For bolt spacing, I recommend placing fasteners no more than 150 mm apart. A 300 mm plate needs at least two bolts. A 450 mm plate needs three. The goal is to keep the plate flat against the mounting surface with no gaps.
One more detail: always specify whether your mounting holes go all the way through or are blind. Through holes are easier to machine but can leave an exposed edge where debris enters. Blind holes protect the threads but add machining time.
Send Your Full Specs to the Manufacturer Before Ordering
This is the most important step in the process, and it’s the one people skip most often.
Send your manufacturer the full picture: load requirements, surface measurements, operating temperature, applicable industry standards, mounting plan, and tolerance needs. A good manufacturer will review your specs and flag issues before you commit.
Here’s what a complete RFQ looks like:
- Application description (e.g., “linear guide for injection mold base”)
- Plate dimensions (L x W x T) in both metric and imperial
- Operating temperature range and cycle frequency
- Static and dynamic load in PSI or N
- Material grade preference (aluminum bronze, leaded bronze, steel-backed)
- Graphite plug configuration (diameter, quantity, pattern)
- Applicable industry standard (VDI, JIS, NAAMS, SMC, or none)
- Tolerance requirements
- Number of plates needed
- Mounting method and hole pattern details
- Any special requirements (chamfers, edge breaks, custom graphite pattern)
I review RFQs every day. I can usually spot problems within 30 seconds — thermal expansion gaps that are too tight, bolt patterns that don’t align, or plates that are undersized for the stated load. These are issues the buyer simply couldn’t have seen without knowing the manufacturing process from the inside.
If you’re unsure about any part of the sizing process, call the manufacturer. A 10-minute conversation upfront can save weeks of back-and-forth and prevent expensive mistakes.
Getting the right graphite wear plate size isn’t complicated, but it does require a systematic approach. Measure carefully in both metric and imperial. Account for temperature before you lock in dimensions. Pick a thickness that gives you a safety margin. Know which industry standard applies. And when in doubt, talk to your manufacturer before you order. I’ve seen that combination save customers thousands of dollars in replacement costs and production downtime. It’ll save you the same.
Need help sizing a graphite wear plate for your application? Send us your specs and we’ll review them free of charge.